Other Posts in This Series
I’ve always wanted to learn how to build mesh in Second Life. I’m pretty good at moving things, sizing things, and doing things with prims in world, but mesh is a whole different animal. Reading up, I see folks say, “Learn Blender! It has a learning curve, but it’s worth it!”
So, yesterday, I dove into Blender for several hours to do just that.
Disclaimer: I am a 100% Blender noob. So this is for the noob by the noob.
Everything I’m writing here is super, super basic for people who are like me — struggling just to do something with the program. I’ve tried to mess with Blender before, but the UI and the lack of user-friendliness always left me baffled. This time, I put my nose to the grindstone, pulled up a bunch of videos and Google searches, and ended up with an actual textured mesh structure Second Life by the end of the night! Woo!
About Blender
Blender is a free 3D modeling program for anyone to download. So pick it up here.
The version of Blender I’m using for this tutorial is v2.79.
It’s wonky to learn. It doesn’t control anything like other programs I’ve used. The things that got me from the start were:
- You select stuff with the right mouse button instead of the left.
- Things that should be easy to do feel more difficult than they should be.
- Blender asks you to remember keystrokes to do stuff. So memorize them!
But all of this can be overcome. Here’s a little cheat sheet of very basic info I learned that I want to dump here for my own reference, and for yours if you need it.
Save, Save, Save!
Did you get something going that looks pretty good? The project going well?
Save it!
Save often!
Save as many different files as you progress. Verson 1. V2. V3….
There were too many times I had to go back to an old save because I messed something up and had no idea how to fix it as a Blender noob.
Did I mention save?
Blender Modes
Blender has things called modes. There are several modes, but for the sake of simplicity, I’ll only reference Object Mode and Edit Mode.
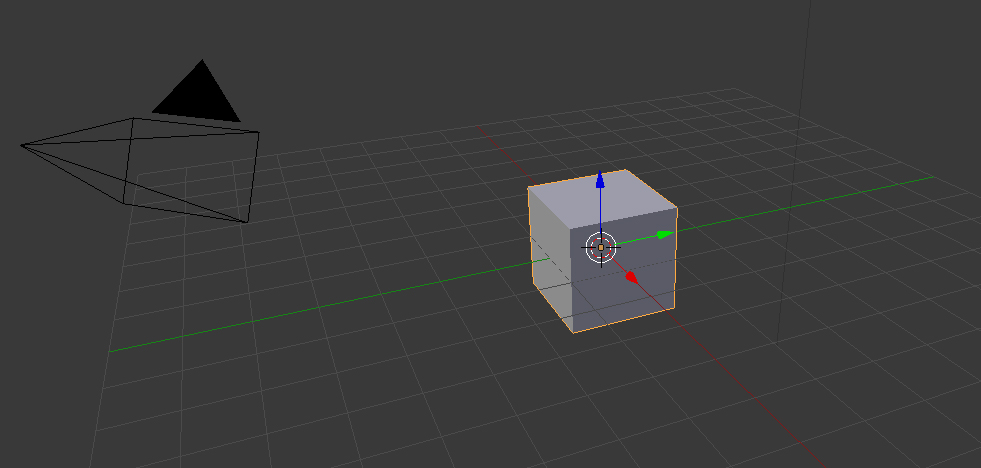
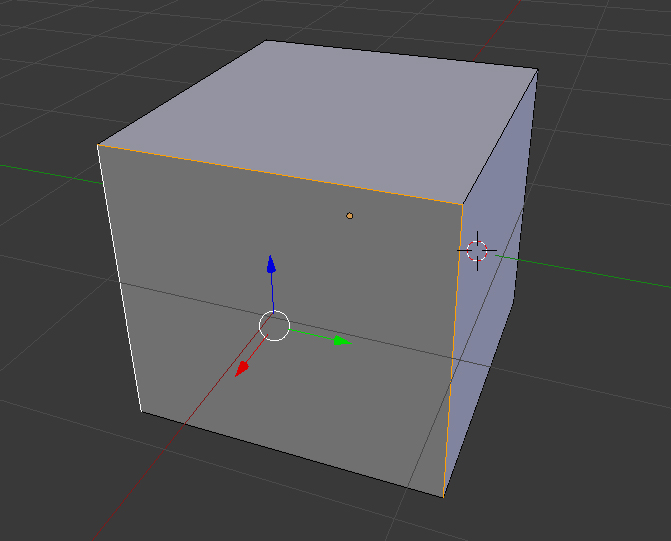
When you open the program, you’re greeted with this little cube. By default, it’s in Object Mode.
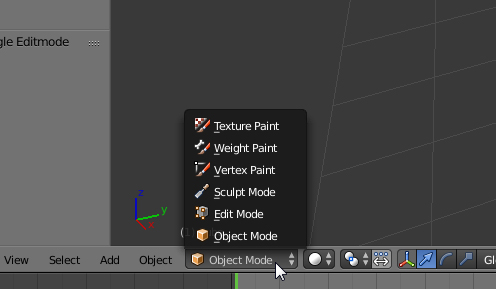
As long as you have an object selected, you can press Tab to cycle between Object and Edit mode. You can also just click the menu down in the bottom left side of your viewing window to pull up all the modes and switch between them.
This is only available if you’ve actually selected an object (right-click it). So if you find yourself tabbing furiously, and you can’t get out of Object Mode, it means you don’t have any objects selected! (Lesson learned.)
Things work differently depending on which mode you’re in, but obviously, Edit Mode is where you do all your building.
Getting Around
How do I move around in Blender?
This is honestly trickier than it should be.
Scrolling the middle mouse button = Zooming in and out.
Hold down the middle mouse button + Move your mouse around = Moving the camera around the center point of your project.
I got that pretty easy, it’s mostly standard. But to do this this thing called Grab/Move so that you can re-position the whole project, was a little more tricky to figure out.
Hold down the Shift key + Hold down middle mouse button + Move your mouse around = Grab/Move around the project
Whew! Okay. We know how to move around now! This still takes practice and time to get a feel for it, so just keep trying.
Making Stuff
How do I make a new object in Blender?
Okay, so you’ve got one cube, but you want another. How do you make something new appear?
Clicking on Shift + A will give you this menu in the Edit Mode.
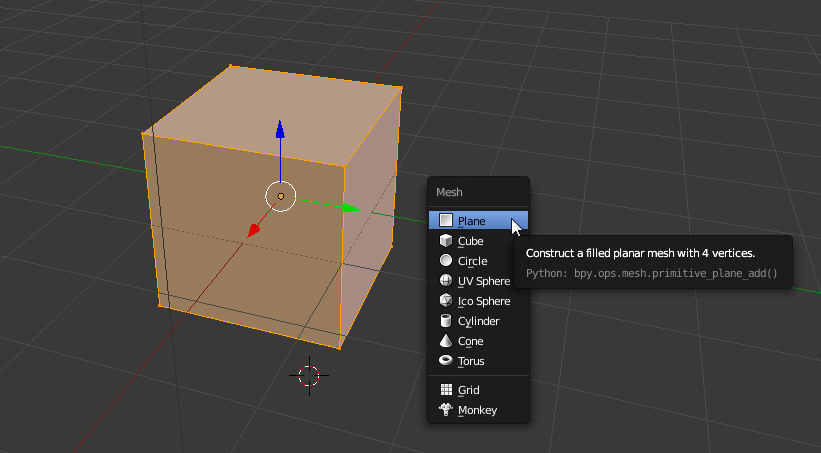
Just pick the thing you want to make and it appears.
It’s a little more complex if you do it in Object Mode.
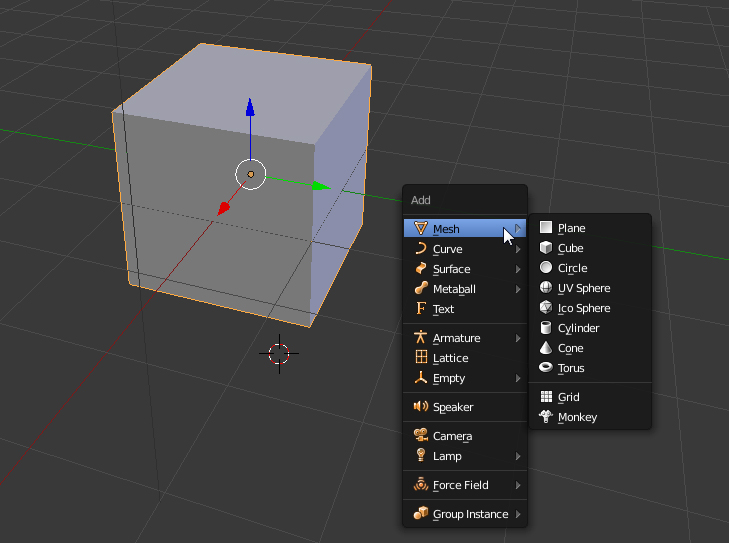
See how things are a bit different between the two modes already?
Keep in mind that everything you add to this project is considered one object by Second Life. So if you were to export two cubes together, that’s what you’d get when you import the object as a mesh in SL.
tl;dl: So, be sure to delete any extra stuff you don’t want hanging around before you export!
How do I move a Blender object?
If you’ve played Second Life, this is pretty much the same. With the object selected, grab one of the handles – Red, Green, Blue — click, hold, and drag.
Wait, how do I select a Blender object?
This was one of those things that should be super simple, but isn’t. Took me some Google-Fu to find.
In Edit Mode:
Select an object = Hover your mouse over the object, click the L Key.
In Object Mode:
Select an object = Right-click on it.
In Edit or Object Mode:
Select all objects = Click the A Key (when nothing else is selected).
Deselect an object/all objects = Click the A Key (when you have something selected).
How do I delete a Blender object?
In Object Mode, select the object (right-click) and press the X key. Choose Delete.
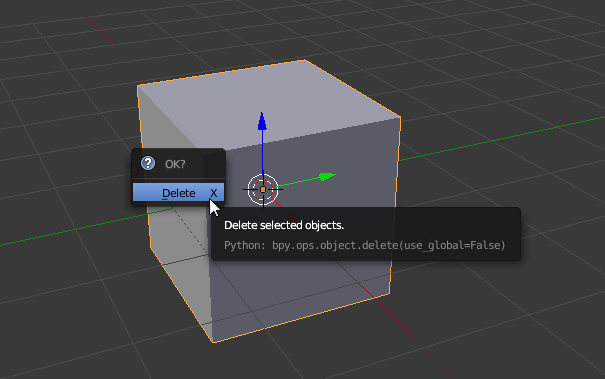
In Edit Mode, this changes! It gets much more complex…
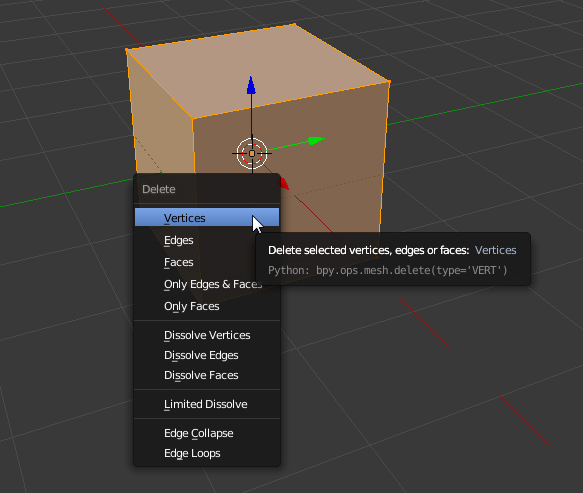
Don’t worry about this right now. I wanted to mention it because this will come in handy later! 🙂
Oops, I made a mistake!
Ctrl+Z = Undo last action
Ctrl+Shift+Z = Redo the undo
Ctrl+Alt+Z = Pull up a history of actions
How do I resize a Blender object?
Here’s where something is trickier than it needs to be.
To scale the whole object:
- With the object selected in Edit Mode, press the S key.
- Drag the mouse outward to make it bigger or inward to make it smaller.
- Left-click on the object when you’ve made it the size you want.
To resize along an axis:
- With the object selected in Edit Mode, press the S key.
- Press the letter key corresponding to the axis you want to size along:
- To resize along the X axis press the X key.
- To resize along the Y axis press the Y key.
- To resize along the Z axis press the Z key.
- Drag the mouse outward to make it bigger or inward to make it smaller.
- Left-click on the object when you’ve made it the size you want.
I find this way wonky, and not very precise… though it does what it’s supposed to do. I use a different method that feels a lot more like working with prims in Second Life!
Selecting Faces, Edges and Vertex
Okay, this is where building for me really started to take off. This is all directly related to resizing and shaping your object (I’ll show you), and is the key to getting stuff done.
When you’re in Edit Mode, there’s a little menu to the right of it that allows you to select a Vertex, Edge or Face of your object.

Right-click with any of these active to select the part of your object. I didn’t mess much with the vertex, so I’m going to talk mostly about edges and faces.
Here, I have the top face of the cube selected.
Here I have the right edge of the cube selected (in white).
You can select more than one face or edge by holding down the Shift key and right-clicking on multiple faces or edges. Here I have several edges selected
Now with that introduced, let me show you how I like to build and resize.
My Noob Method
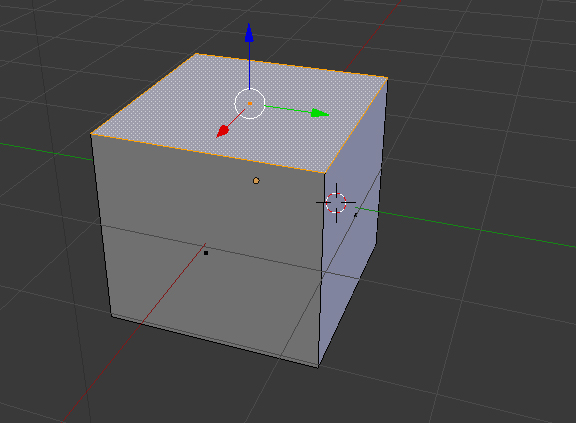
Rather than messing around with that whole S key business (unless I want to scale up the whole object), I select a face of the object, much like you’d do in Second Life, and use the handles to resize the object.
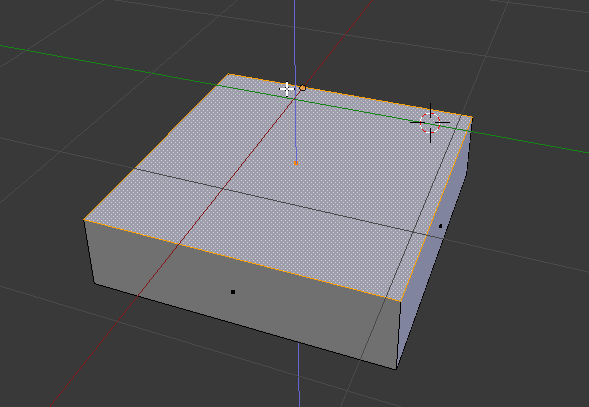
Here, I’ve made the cube more flat by selecting the to face and using the blue handle to push the top downward.
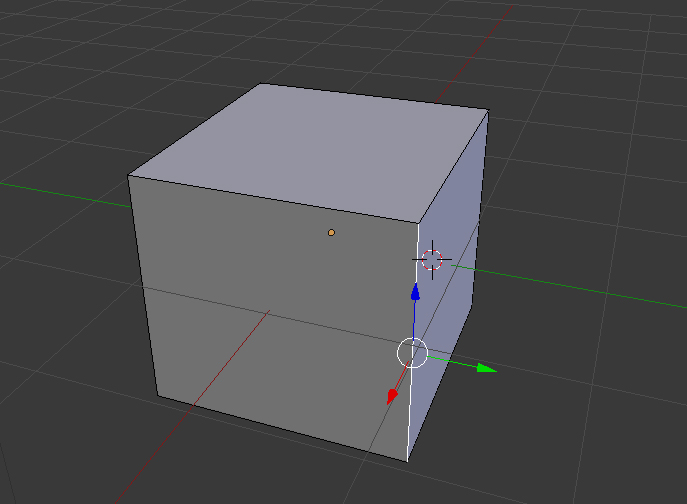
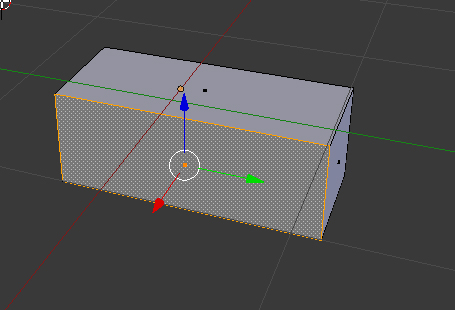
Now I’ve made it even smaller, by selecting the front face of the cube and using the red handle to move it inward.
And using this technique, I was able to eventually build the outside walls of what will become my first mesh house.
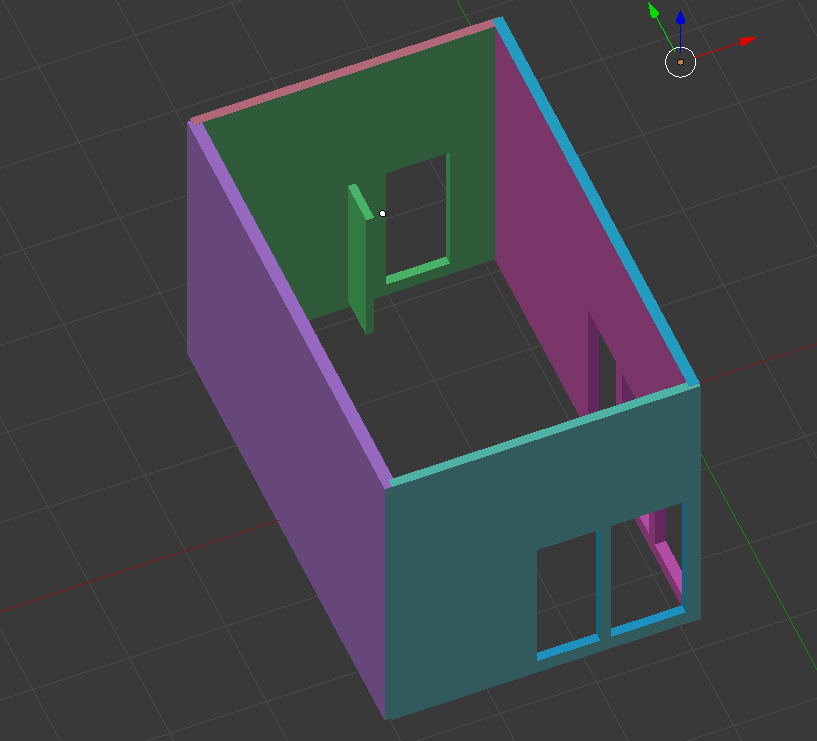
This is just a rough draft, and a noob try, but not bad after one day of stumbling through learning the program!
I’ll talk more about how to cut out the windows and doors and more advanced things like that in the next post. But for now, you have the basics of working with shapes. Get to it! 🙂
Categories
*|* {April} *|* {2018} *|* {Second Life} *|*
Other Posts in This Series